Page 3 of 9
Posted: Sun Feb 26, 2012 3:02 am
by Cakedaddy
We use water and mud. Just get it soupy and use a paint roller. Less water=bigger globs/texture. But this will only cover minor stuff. Start with very little water. It's kind of like mixing cement. It never seems like you've put enough water in it, until you've put way too much in.
Posted: Mon Feb 27, 2012 8:31 pm
by unkbill
I really couldn't even guess. Would be quite a bit of mud. You want it thick. Actually the last time I did it I took a half gallon of pre mixed mud and started to thin that down with primer. Doesn't take much primer. And the reason you use primer instead of water is you don't have to primer after you texter. You cut out a step before you paint.
Edited By unkbill on 1330392768
Posted: Mon Feb 27, 2012 9:28 pm
by GORDON
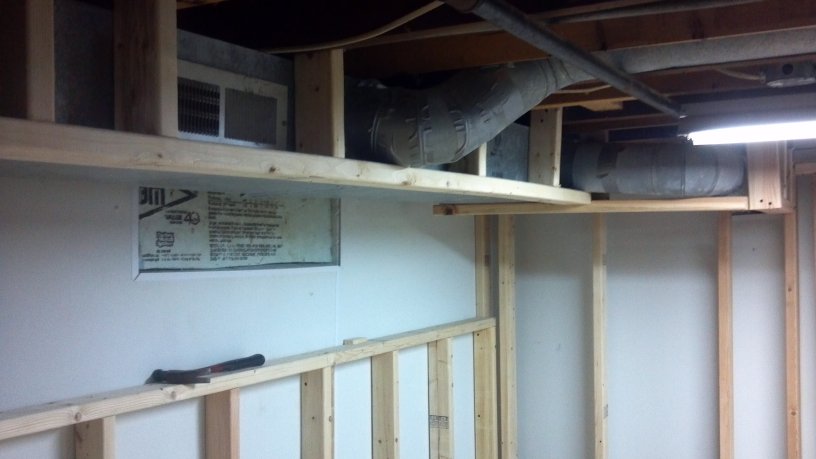
Decided to build a half-wall on the south wall, where the TV is going. This leaves the crawl space accessible, I can hide the network and power lines for the entertainment center in the wall, and I can turn it into a nice shelf.
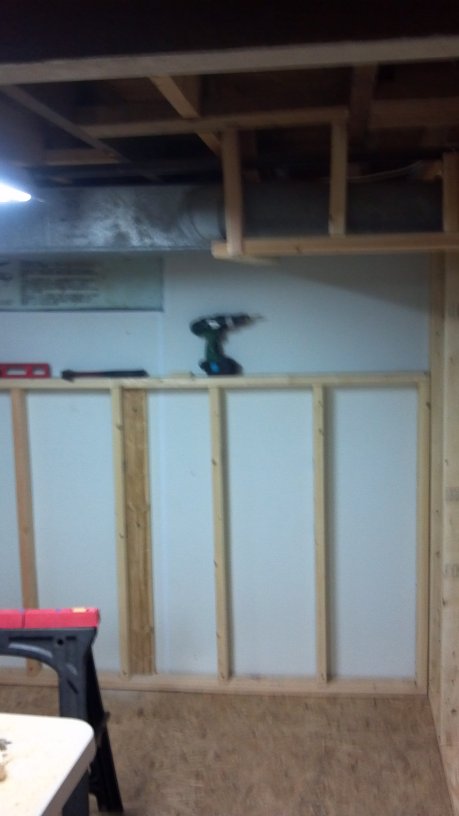
The board in place sideways (under the hammer) is anchored to the wall in approximately the middle, and the framed wall is anchored to it. Makes it nice and sturdy and won't pull away from the wall, since there is no top plate anchored to the ceiling.
Tomorrow's task is to build another half wall between where the couch and desk will be. I just decided to do that yesterday. It's going to be neat.
But after that the wiring starts.... and I am all ready for that, too.
Spent another $50 on lumber.
Running tally: $985.
Posted: Tue Feb 28, 2012 3:41 pm
by GORDON
GORDON wrote:Spent about $160 on drywall, mud, screws, nails, trim, light fixture, shelves (not pictured)....
Pictured:

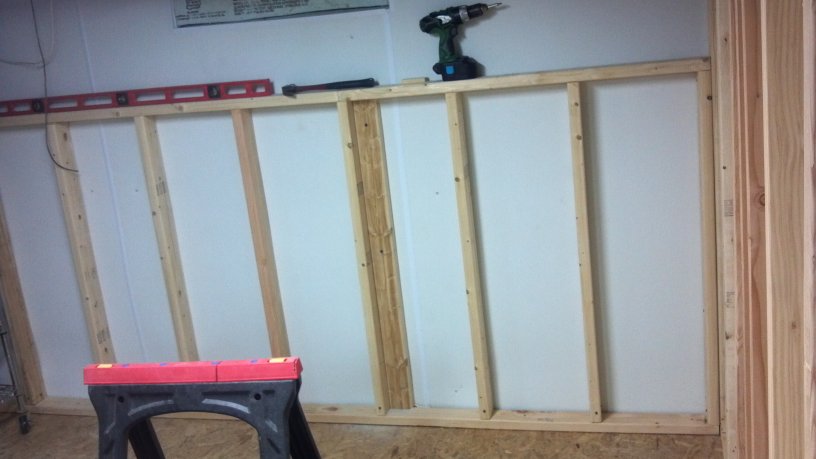
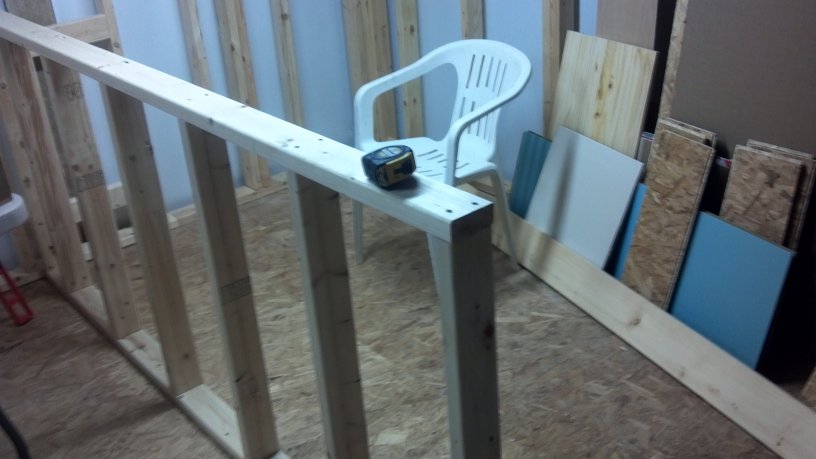
I built a half-wall between my desk area, and the couch/entertainment area. I wanted the heighth to be enough to clear the back of a typical couch, and high enough above the level of my desk that it would be at least higher than the size of a DVD, if I had some lined up beside my monitor. I am going to build the desk myself, so this half-wall is going to be the actual backstop for my work space.
So I measured the height of my couch, which I think is typical. Little over 3 feet high. Measured the height of my current desk: about 2 feet high. SO, I figured, if the wall is 40 inches high, it should be where I want it, and not so high that I cant see over it when sitting behind my desk.
Put down the base plate... 7.5' long, exactly 5' from the back wall. Then I started cutting my studs 40" long, placed them, and put on the top plate, 7.5" long. Everything square and level and good to go. I kept thinking it looked a little high. 2 studs in, out of 7, I am testing it by bringing a little chair wher the desk will be and figuring, "well I can MOSTLY see over the top..." I get the entire wall done, kind of thinking it looks too high. Then I realize I am not even done yet making it higher, because there will be a nice .75" top plate on top of it all.
Figure out my mistake, yet?
I wanted a 40" high wall, and I cut my studs 40", and didn't account for the thickness of the top and bottom plates.
So I tore it all down, recut it, and rebuilt it.
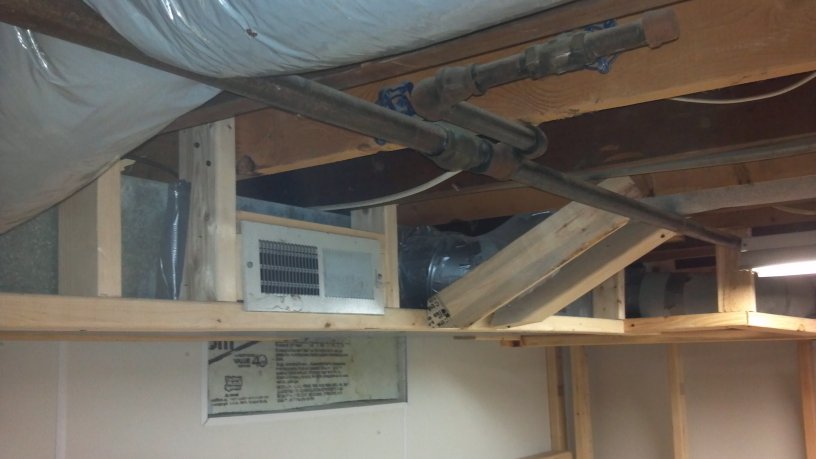
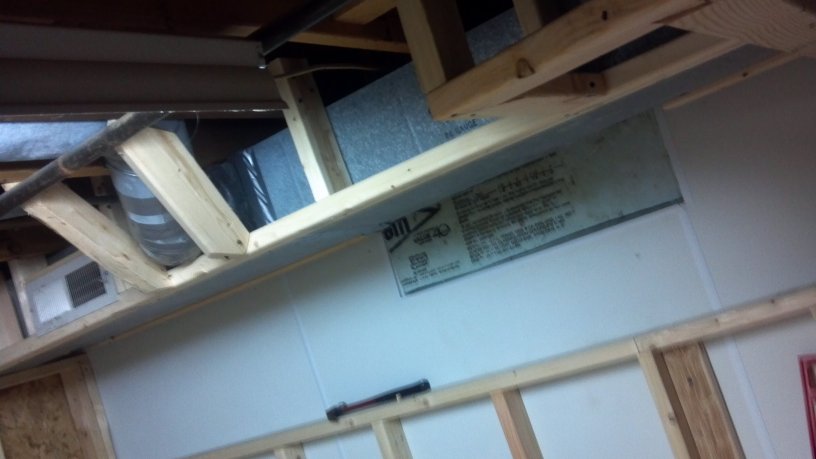
Then I went a long way into framing in the duct work, which I hope to complete tomorrow.
And then, like I said, wiring.
Spent another $40 today on outlets and switches.
Running total: $1,025.
Edited By GORDON on 1330461793
Posted: Thu Mar 01, 2012 8:20 pm
by GORDON
Finished framing in the duct work.
Thus ends the major carpentry, so I cleaned up and put the saw away.... and went into electrician mode.
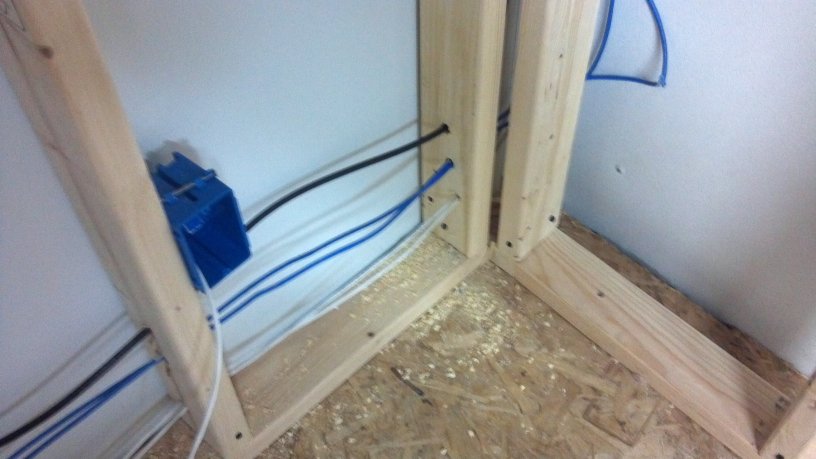
I have the low voltage wire pulled. White is audio, blue is Cat-5e, and black is Coax Quad Shield.
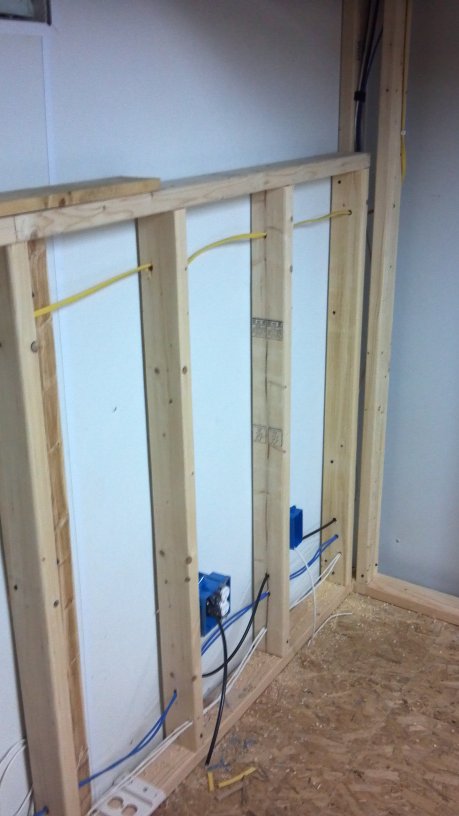
This is where the entertainment stuff will be; TV, receiver, PS3, etc. I have 2 Cat-5e lines going there, all the audio, and coax.
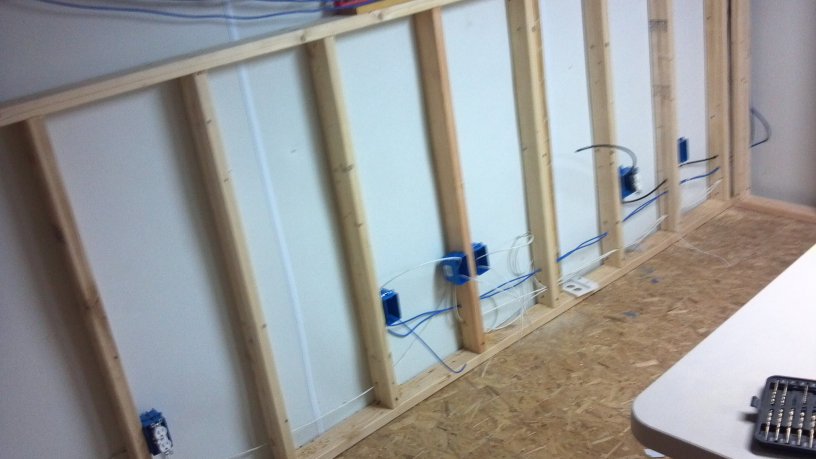
Hey, notice that line sticking out from behind the stud, in the corner? My dumb ass nicked it with the drill when I was making the hole for the coax, and now I have to splice it.
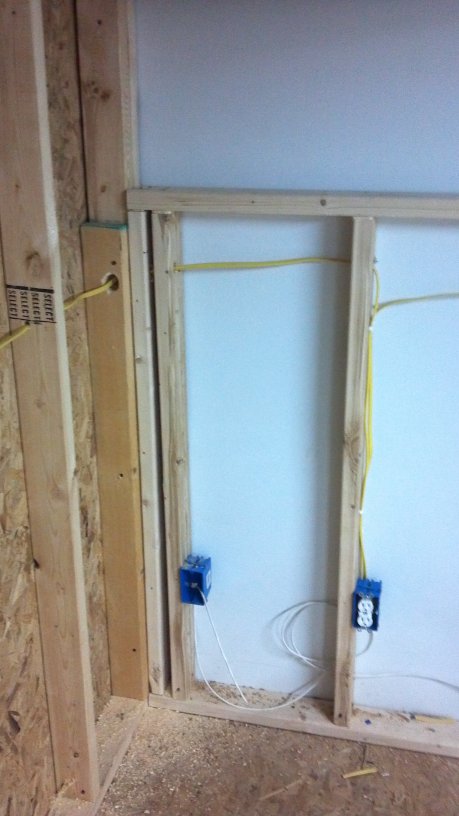
This is my desk/work space. 2 Cat-5e for my personal area, and a phone line.
There's another Cat-5e for a guest plug-in (or I could use it at my work bench area).
Not pictured: I forgot to order an HDMI line from the entertainment area (where the receiver will be) to my desk, where I am going to have a small TV for when I am gaming and don't need to have the 60" plasma on. The receiver will have 2 HDMI outputs to put the signal where I want it. 30' HDMI Cable should arrive in a few days. Note: cable and a couple female/female adapters for the ends was going to cost me $70 on newegg.com. Got the same things for $24 on amazon, with free shipping.
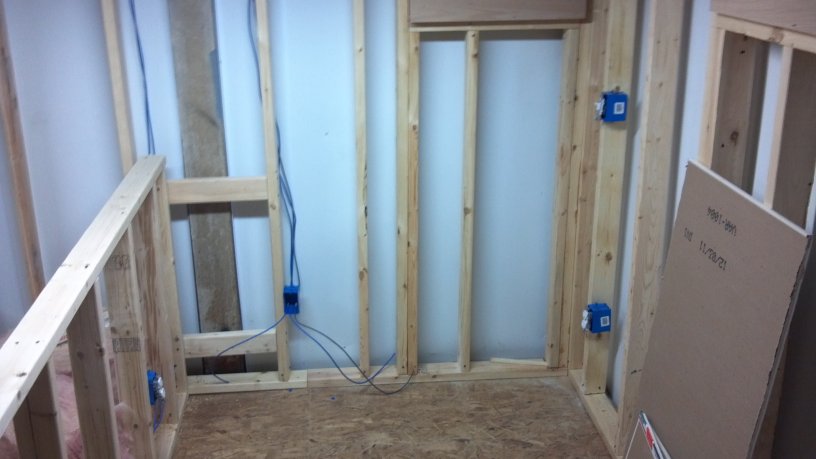
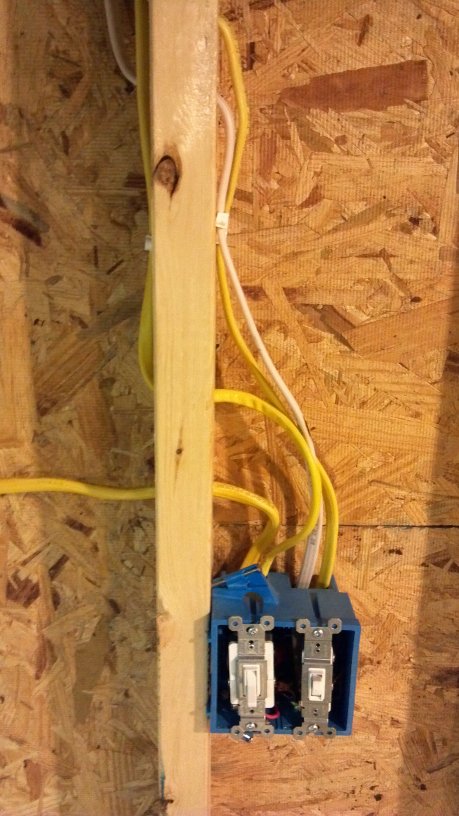
Here's inside the door. One switch is going to go to a plug to turn a lamp on and off (the ceiling is too short for a fixture or ceiling fan), and the other plug is going to turn on some recessed lighting in the ceiling that will shine on the entertainment center for when I have to have good lighting on that area, for whatever reason.
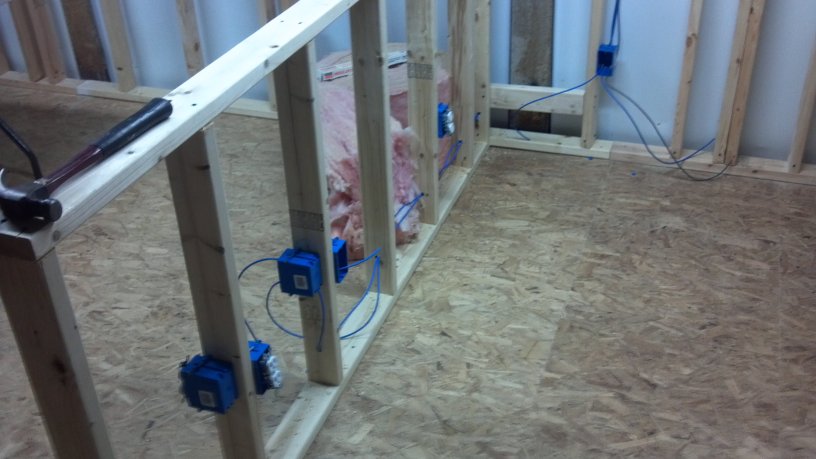
I have the electrical outlets in place, but haven't pulled that wiring yet. A little hesitant since I have never pulled high voltage before, and I going to be learning as I go. I am starting tonight, though, as I may have a partner to help me drywall this weekend, and the wiring has to be done, first.
Edited By GORDON on 1330651345
Posted: Fri Mar 02, 2012 11:50 pm
by GORDON
I put off the drywalling because I need more time to get the wiring finished up this week. I have the HDMI cable in transit, as well as PC rear-speaker line extensions, which will also be buried in the walls. My shit is going to be awesome. I had forgotten the PC speaker lines until I woke up in a cold sweat at about 4 am this morning.
Also trying to talk myself into installing the breaker subpanel myself, to save money. My book tells me how to do it, and my local Menard's has all the stuff....
Posted: Fri Mar 02, 2012 11:54 pm
by GORDON
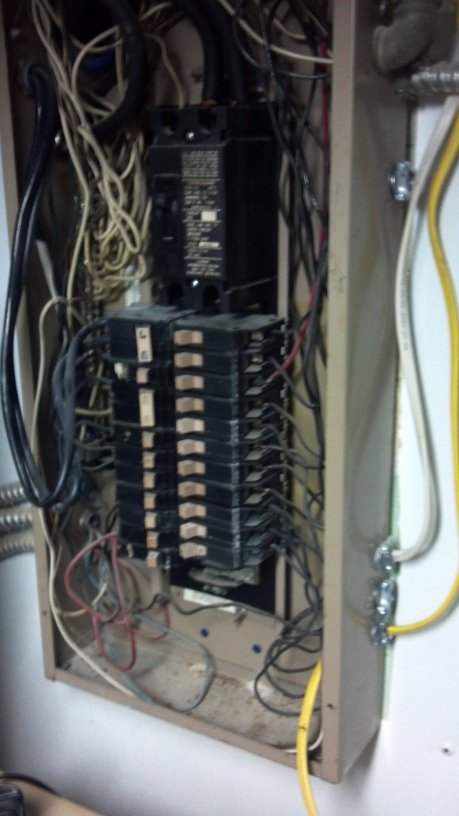
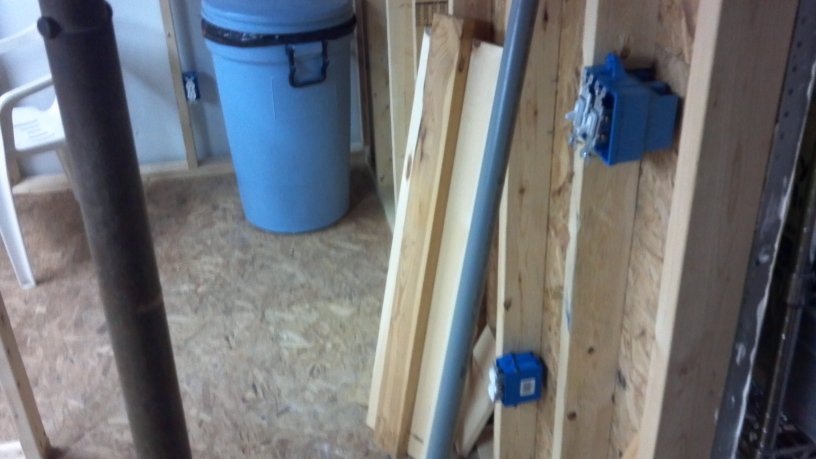
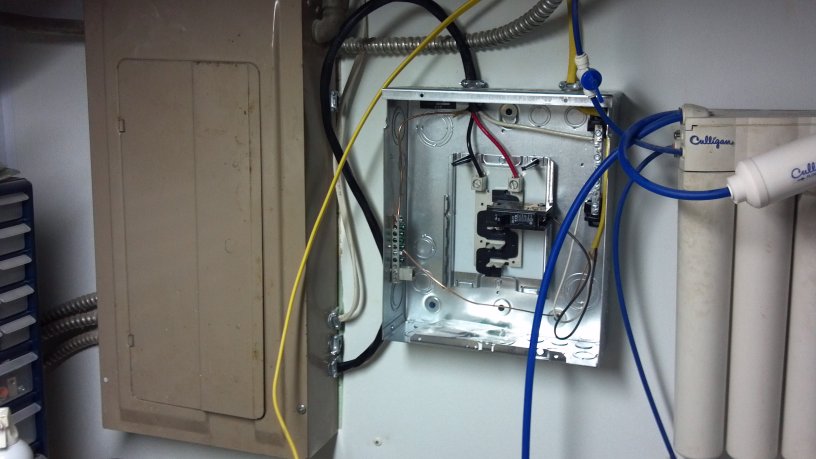
Oh, also, funny story: You can see the new line I ran into my breaker panel, it is the yellow one in the bottom right. When I was feeding it through my knockout, I was kind of feeding a couple inches, and pulling it forward to bend it around a turn inside the panel. Doing that over and over, feeding the 2-feet of line, or so.
Well, after about the 4th little pull and bend, the entire bottom portion of the panel pulled itself out of the wall, anchors and all. I tapped those back in place, unscrewed one of the screws, and the maniacs had it held in there with a little half-inch screw in a cheap plastic anchor.
I got out the hammer drill, bored out the holes, and anchored the damned thing with concrete anchors. You can see the 2 blue dots (Tapcons) near the bottom of the panel, and little piles of pulverized concrete from the drill.
God damned people.
Edited By GORDON on 1330750785
Posted: Sat Mar 03, 2012 5:29 pm
by GORDON
Installed a new subpanel today, and my first circuit of outlets has power. It is really fucking awesome and I am awesome.
Pics later.
Posted: Sun Mar 04, 2012 4:57 pm
by GORDON
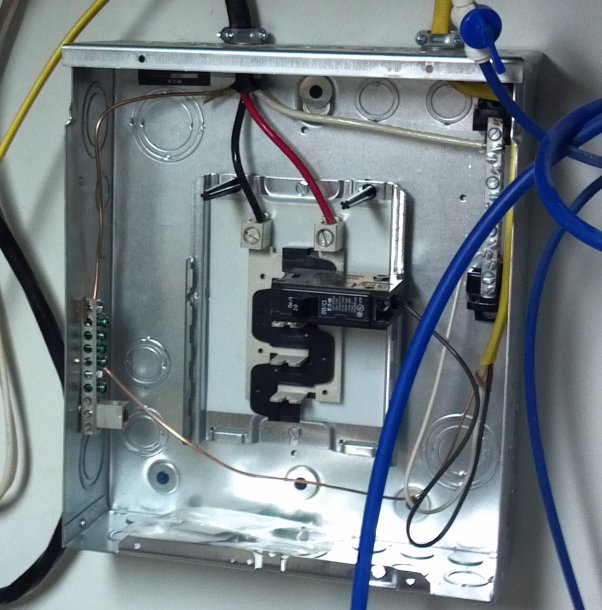
This is the subpanel.
Used an 8-guage wire (the black one) to bridge over from the old panel, where I used a double pole 40 amp fuse. That 8-guage wire costs $30 for 15 feet. Thick and harder than hell to cut. Anyone want to buy 10 feet of it for $10? A steal.
In these pictures there is one circuit already plugged into a 20 amp breaker and is hot, and the second circuit isn't installed yet and is dangling off to the left. I had a little boggle with these fuses... this is a newer style than I had ever seen, and they have a hard reset that you need to trigger before they work. When I plugged everything in I wasn't getting power to the outlets, and I was all WTF. My voltage tester told me I had 123 volts going to the hot bus bars of the new panel, but I wasn't getting anything after the breaker. Unk came over and had it figured out within, literally, 5 seconds.
Hey, cut me some slack. Learning this shit as I go.
As I said, the second circuit is half done, I just got tired of wiring outlets after the first 3 and a half. Two and a half outlets to go, then I plug it in to the breaker. After that, one more circuit to run, to a couple overhead lights, a couple switches, and a plug.
Tomorrow.
Edited By GORDON on 1330898318
Posted: Sun Mar 04, 2012 4:59 pm
by GORDON
Spent $80 on the new panel, wire, and fuses.
Running tally: $1,105.
Posted: Sun Mar 04, 2012 7:00 pm
by GORDON
I just noticed I was spelling "gauge" wrong.
I wonder why the firefox spellcheck didn't catch it.
Posted: Mon Mar 05, 2012 4:57 pm
by GORDON
Finished the second circuit, and now I have power to outlets where my desk will be.
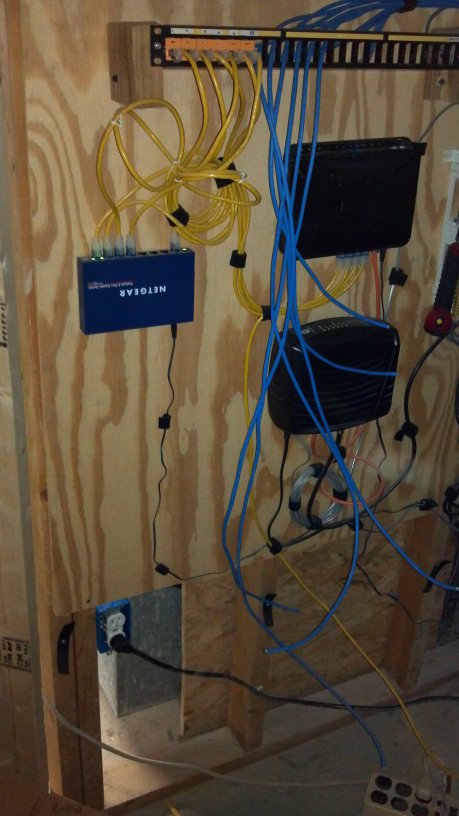
Started the third circuit, which first creates a dedicated outlet for my server. It is currently sharing an outlet with my furnace, dehumidifier, router, cable modem, switch, etc, and even though it is on e brand-new UPS, I think I am still getting undervoltages when the furnace kicks on, from time to time. Yes, this shouldn't be possible with a good UPS.... but once or twice a week the server goes down with a loud whine that you can hear through the house, and when I go downstairs to power it down the furnace is ALWAYS on, right next to it.
So my best guess was as undervoltage.
It is on a new circuit now away from the furnace, so we will see.
Here's a picture of the new outlet, bottom left on the DMarc. Dangle blue Cat-5e lines are the new ones I have run, but not yet terminated.
And here is the completed subpanel. One bridging wire, and 3 circuits, all nice and neat.
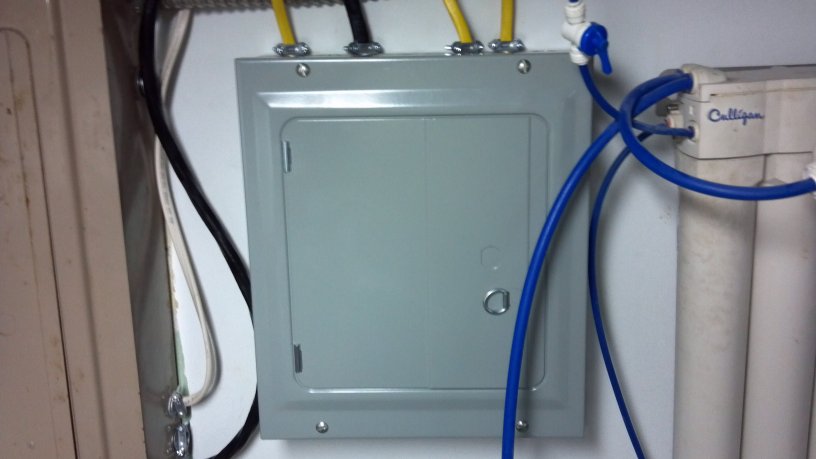
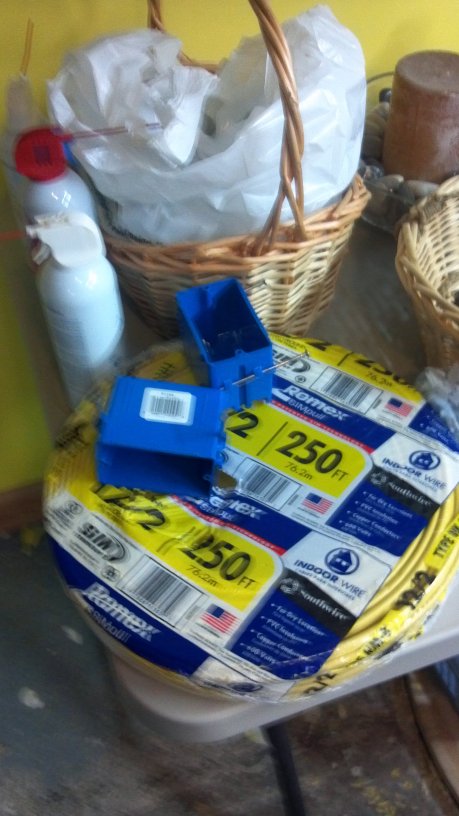
Going to run the switches tomorrow, which will finish circuit 3. I am guessing I am going to run out of 12/2 NM wire before I am done. I didn't think I would go through 250 feet of it, but it is going to be close. Have had very little waste, as well. I dunno.
Posted: Wed Mar 07, 2012 3:43 pm
by GORDON
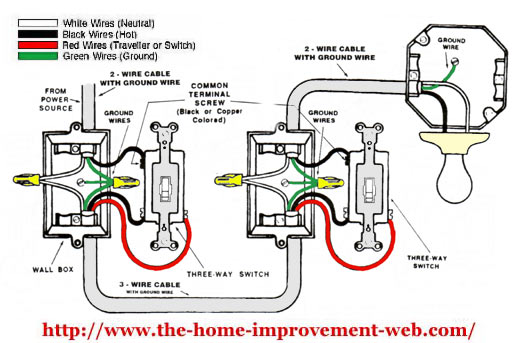
Finished running the 3-way switch.
A 3-way switch is when 2 switches control a light fixture, or in my case, an outlet. Specifically, one plug out of two on an outlet, which required some minor modification of said outlet. The bottom plug is always on, the top plug is controlled by the switches. So now I have 2 switches that will turn a lamp on and off, as needed.
Here's the switch behind my desk... when I enter the room I can turn the light on so I can maneuver through to my chair, and once I am seated I can reach behind me and turn off the light for mood gaming.
Orange box is where my PC speaker cable is going for the rear/left speaker. Never got that in a pic before.

Here is the work light I put on the outlet for testing.
Funny story, bro: I was trying to be careful and work these plugs without turning off the breaker, because the server is on it and I didn't want the UPS beeping at me. But then of course I grabbed that outlet I was talking about and the bottom plug is hot and I shocked the shit out of myself.
Good times.
30' HDMI cable has arrived. Will get that in the wall pretty soon. I have one more tiny little line to run for some recessed lighting. Once it and the speaker extension cables are in the walls, it is time to drywall.
Spent another $25 today for some 12/3 Romex for the 3-way switches.
Running tally: $1,130.
Edited By GORDON on 1331153180
Posted: Wed Mar 07, 2012 9:12 pm
by Cakedaddy
Since you haven't mentioned it, I'm guessing you didn't pull permits for any of this. Are you concerned about when you go to sell the house and there's a new sub-box and room down there? You're house don't match the prints they have downtown.
Posted: Wed Mar 07, 2012 9:43 pm
by GORDON
Cakedaddy wrote:Since you haven't mentioned it, I'm guessing you didn't pull permits for any of this. Are you concerned about when you go to sell the house and there's a new sub-box and room down there? You're house don't match the prints they have downtown.
IT WAS LIKE THIS WHEN I BOUGHT IT, I DONT KNOW WTF HEY OTTAWA COUNTY GET YOUR SHIT IN ORDER.
Posted: Wed Mar 07, 2012 10:42 pm
by unkbill
Cakedaddy wrote:Since you haven't mentioned it, I'm guessing you didn't pull permits for any of this. Are you concerned about when you go to sell the house and there's a new sub-box and room down there? You're house don't match the prints they have downtown.
When I first read this an hour ago I couldn't respond because I was laughing to hard. (Not because you said it but because)
Ottawa county has only a few rules.
1. Pull a permit so we can inform the taxation people and they can raise your taxes. We don't care if we inspect the job or not.
2. If you get caught not pulling a permit you pay double for all the permits.
3. Start back at rule 1.
Posted: Wed Mar 07, 2012 11:06 pm
by GORDON
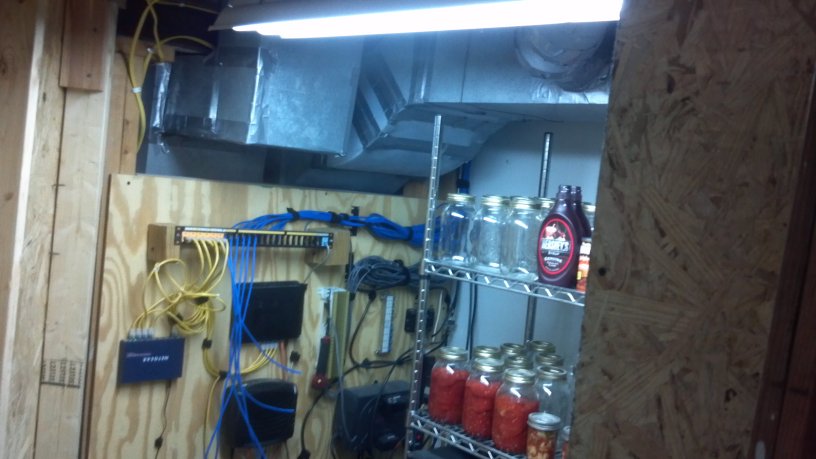
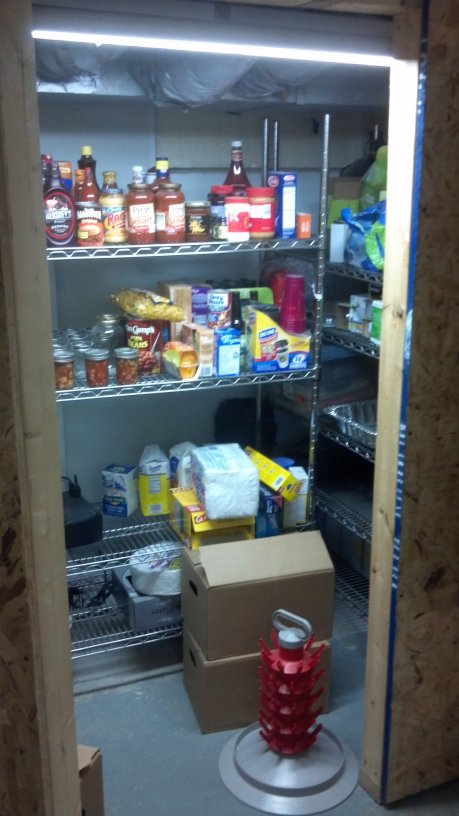
Finally installed a light in my pantry, what I have been dreaming about for a year. IT'S SO FUCKING BRIGHT IN THERE.
Pics later.
Posted: Thu Mar 08, 2012 4:53 pm
by GORDON
GORDON wrote:Finally installed a light in my pantry, what I have been dreaming about for a year. IT'S SO FUCKING BRIGHT IN THERE.
Pics later.
I am coming down with something so haven't done anything in the basement today, but here's some pics of the pantry so you can ooh and ahhh at the new bright light.
Posted: Tue Mar 20, 2012 7:58 pm
by GORDON
Got a cold or mono or something the night I installed that pantry light, so I haven't done much the last week.... but I did finish the last of the wiring.
These are in no particular order:
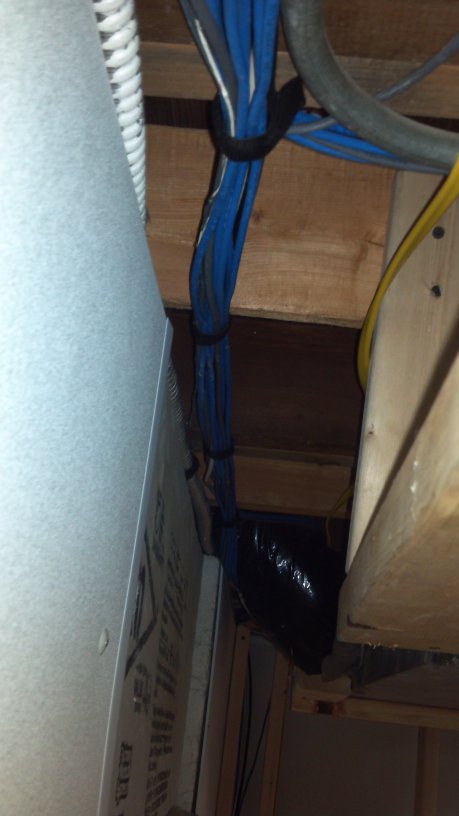
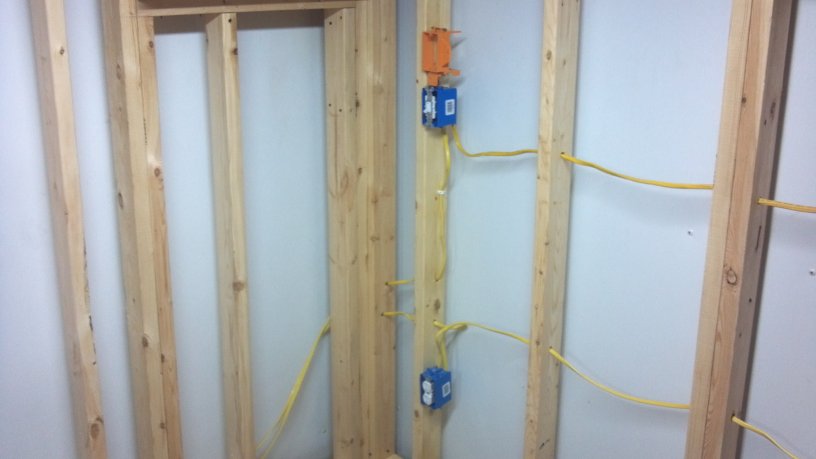
This is kind of a busy area of wiring. They are turning that corner behind the joist and going down into the top plate of the new wall... good thing I left an access right there for a water-line cutoff when I finished the laundry area ceiling. I hadn't planned on needing to run wires through there.
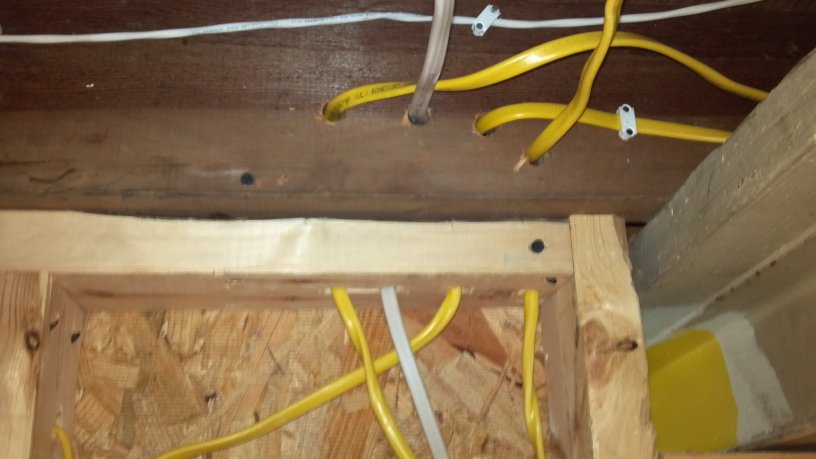
This is one end of my 30' HDMI line, where my desk will be. I already have couplers for a wall plate, or an HDMI patch cable.
This is the same corner. Electrical, PC speaker cables, CAT-5e.
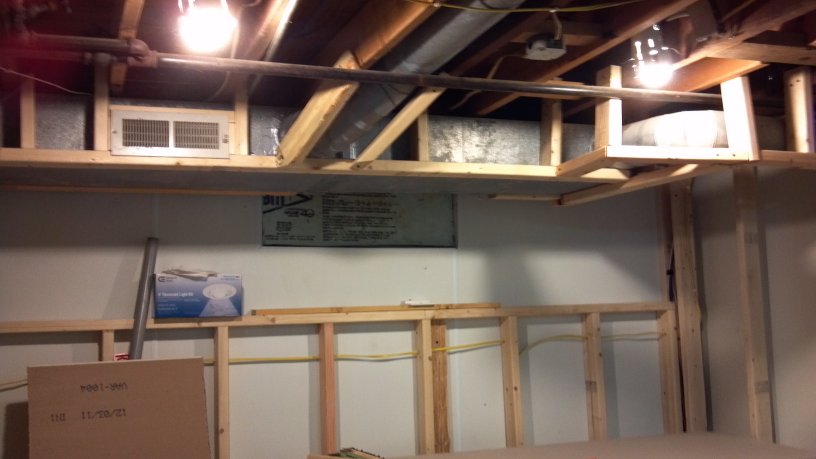
These are 2 recessed lighting fixtures, installed temporary-style. I am probably going with a drop ceiling for easy access to the floor/ceiling area, and I don't know yet how low the surface will be... so for now they are just velcro'd up.
This is a junction box... my book told me that all splices should be in a box, not just exposed. One hot goes in, and splices to 2 lines that go to the double switch plate.

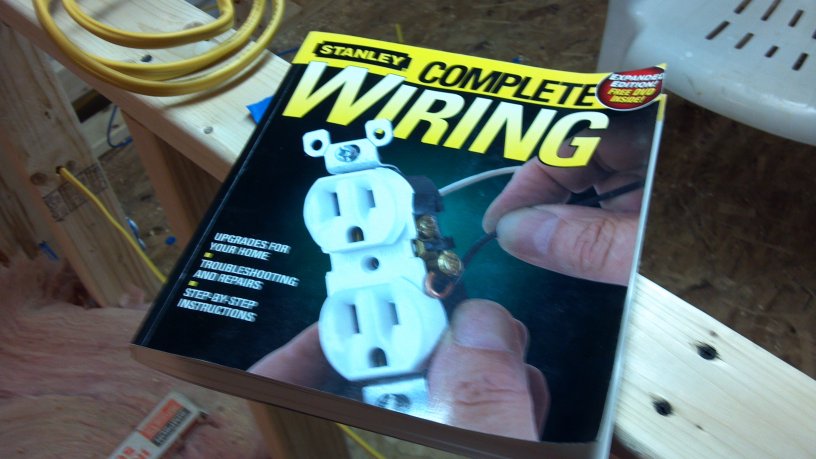
And this is the awesome book that taught me everything about running electrical lines, switches, subpanels. and anything you need to know about running voltage.
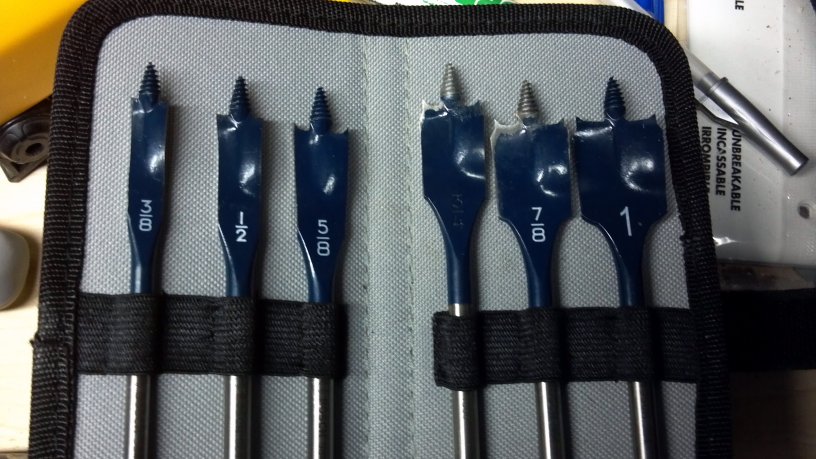
This is an awesome set of spade bits I bought to drill holes for lines through wall studs. That little screw-but on the end bites into the wood and actually pulls the bit through for you. I actually had to apply some negative pressure to keep it from running through too fast and binding up.
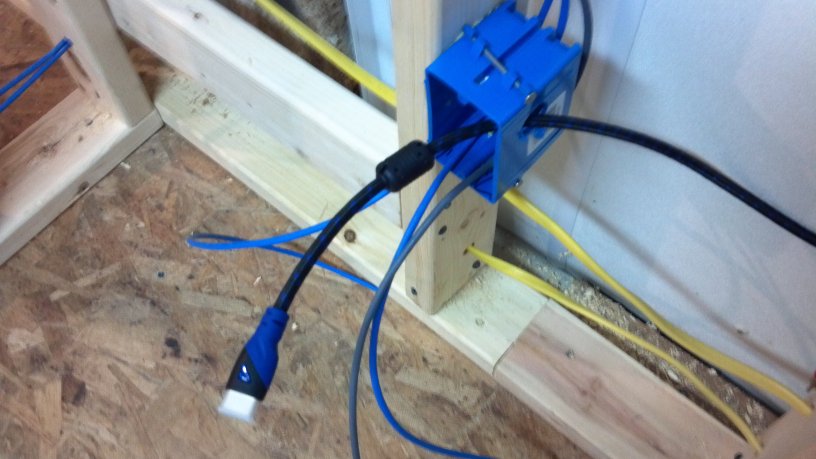
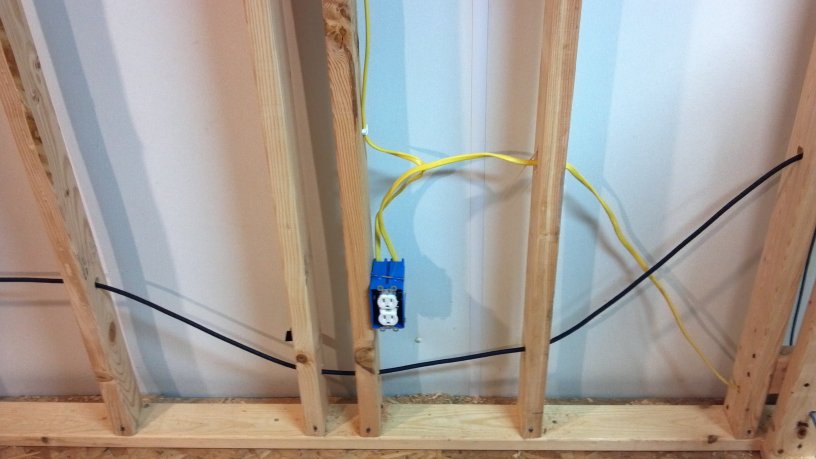
This is the switched wall outlet, and the black line is the HDMI. I tried to keep high voltage and low voltage well separated, but where I had no choice I made sure they crossed at as close to a 90 degree angle as I could, to reduce interference.
Orange box has my PC speaker cable RCA plug in position and ready to go. Switch is one of the 3-ways that control the outlet.
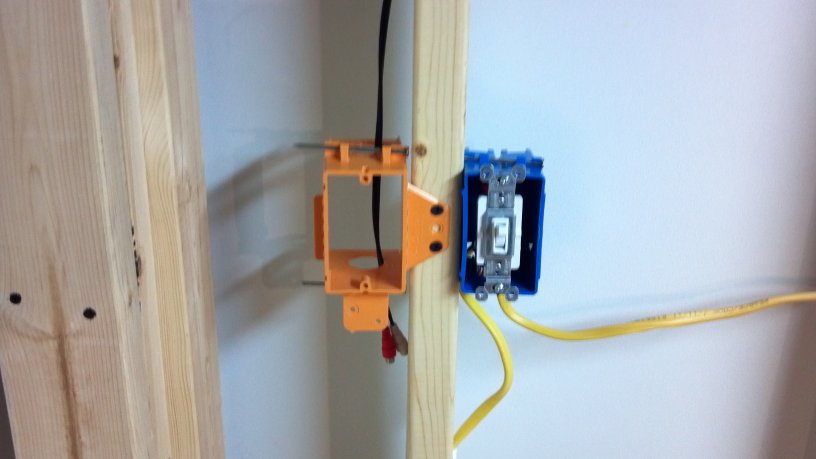
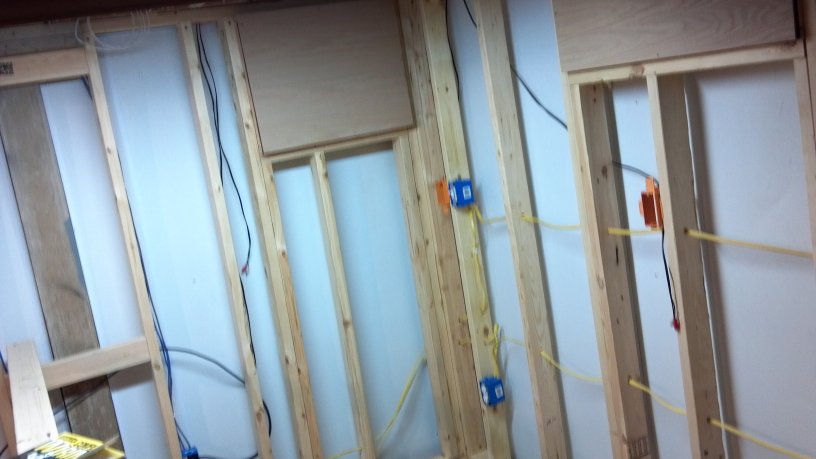
And this is the double switch at the entrance, on the left is the 3-way and on the right is the one that controls the recessed lights you saw in the previous picture. Above is the busy area where the lines are running in the floor joist and down the top plate. They are going down to those switches.
Electrician phase is 100% done. Next is drywall...... I HOPE to start that this week, but winter has ended prematurely and all these frikkin summer projects seem to be starting all by themselves. My goal, though, is to get the room drywalled and painted before Summer officially begins, so I can get my existing computer desk moved down there. I can put it in an out-of-the-way corner, and still build my permanent, custom desk, get shelves built, trim and stuff finished, and get the ceiling in.
Edited By GORDON on 1332288088